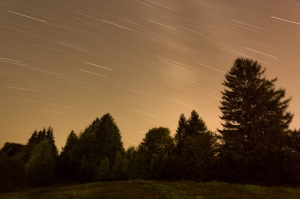
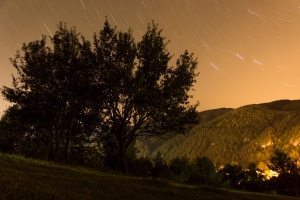
Let me share with you some further star trail photography findings.
First, it’s good to have a location in mind where the sky is as clear as possible. Large cities are not the best choice, as pollution can hinder the visibility of the stars. In addition, checking the weather conditions for the night is essential. If the sky is overcast, then it’s game over before it has even started! The same applies when the moon shines. “No moon” nights are ideal, otherwise it’s better to wait until it sets. So do some pre-work by finding out the “moonset” time and reading the weather forecast.
Second, when the shooting session takes place, you might want to consider the light sources that would interfere with the picture and mess the result. The moon is not the only “offender”! Here an example of what might happen when unwanted light “steps” into the photo : https://callofnatureblog.files.wordpress.com/2014/09/dsc_9908_01.jpg
Which leads me to the third point: if you have no light other than the one from the stars, how can you focus and do the framing? Well, you could work with manual focus from the very beginning. Sometimes, there might be some lights in the area which are “hidden” by natural obstacles (like cliffs). These would be used for autofocus, after which the camera is switched to MF. In any case focus to infinity, the stars are light years away 🙂
Regarding framing, this can be done by “trial and error”. Position the tripod in the chosen place, mount the camera and adjust the tripod head as precise as you can. Then switch to the highest ISO setting, manual mode (Bulb/Time), largest aperture and do some 10-20 second test exposures. The frames must not be perfectly exposed, as they should only help the photographer distinguish the details, so he can gradually adjust the framing and composition. Once done, make the final settings and start the long exposure.
As for the final settings, I already mentioned in previous post that 30 minutes, ISO100, f4 is a good starting point. However, best thing to do before taking the actual picture is doing some test photos and calculations which would help you determine the optimal exposure parameters. The whole “exposure triangle” should be taken into account:
- Which is the desired shutter speed? Depends on which effects you would like to achieve (how long should the star trails be?)
- You might want to close the aperture to get better depth-of field and sharpness.
- You will sometimes be tempted to increase the ISO, however this might not only bring noise but also some other unwanted issues like banding. So keep the ISO value to the lowest possible!
Last but not least, If you need to stand by the camera all the time, better ensure you have something to keep you busy while the equipment does its work. Otherwise, you will feel like centuries until the photo is taken. But don’t forget: let no light interfere with the picture unless this is what you specifically want. And by this I mean notebooks and smart phones in the first place!
I hope you’ll find these “tips” useful. Good luck!
Waiting on your comments 🙂
PS. Check this too: https://callofnatureblog.wordpress.com/2014/09/04/astrophotography/


what a perfect article that makes we want to find a dark field and take some photos! I absolutely love the circular stars photo from your “bad” example – it must have been frustrating to get the light contamination. One question – how long were your exposures in the end?
Thanks Kevin! For most of them I exposed half an hour.